Maybe you don’t know, but you can use an old CRT TV as a monitor for the Raspberry Pi.
Find a SCART and some cables for audio and video and you are done.
You need:
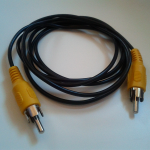
- a cable for the video: it’s a cable with the same type of audio/video plug in each end. The standard color is yellow.
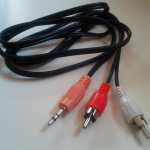
- a cable for the audio: in this case you must have an end with a 3.5mm stereo audio plug and the other one with 2 audio/video plugs. The standard colors are red and white.
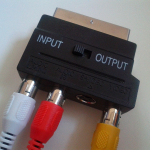
- a SCART adapter suitable for input with audio/video
Than you have to connect the cables as you can easily imagine.
The only thing to keep in mind is to set the SCART adapter to “INPUT”:
The trick does not need any additional work if you use a NTSC TV.
If you are in Europe and you use PAL systems (like me), you must create a config file in the /boot/ path of the Raspberry Pi while it’s running and configure the appropriate parameter.
vi /boot/config.txt

# Set stdv mode to PAL (as used in Europe)

sdtv_mode=2

#

overscan_left=20

overscan_right=20

overscan_top=20

overscan_bottom=20
Overscan parameters allow you to set a proper margin if you see that the image is not centered.
The end.


thank you for concise article.