Tag Archives: ubuntu

Git through a proxy

I was connected to a LAN behind a proxy. When I tried to download something from github I got this error:
fatal: unable to connect to github.com:
github.com: Name or service not known

I’m running latest Ubuntu desktop (12.04).

One way I found to bypass this problem is to create a git proxy wrapper.

  1. Create the script i.e. ~/bin/git-wrapper.sh and configure the 2 variables according to your needs. My proxy is a local service which forwards my requests to the real LAN proxy. Local service is configured to listen on the 5865 port of my local (127.0.0.1) machine.
    #!/bin/bash
    proxy_address=127.0.0.1
    proxy_port=5865
    nc -x$proxy_address:$proxy_port -X5 $*
  2. export an environment variable
    $ export GIT_PROXY_COMMAND=~/bin/git-wrapper.sh

Then you can run your usual git commands.

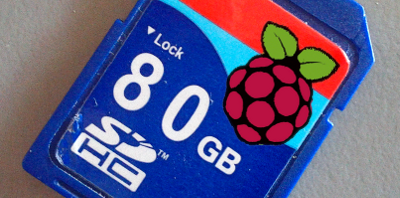
Raspberry Pi tip: resize your sd card

When you download an image for Raspberry Pi from internet (Debian image for example), the size is quite often 2GB.

In my case I’ve always SD cards of 8GB of size. After writing the image to the SD, 6GB of space get lost.

Here’s what I did to resize my Raspberry Pi Debian system without loosing its functionality.

Prerequisites

  • a sd card with Debian for Raspberry Pi installed (or similar)
  • a pc powered by Ubuntu Linux
  • GParted installed

Identify SD card

Plug your card reader and take a look to system messages with “dmesg”:
$ dmesg
[22006.536054] usb 1-1: new high-speed USB device number 3 using ehci_hcd
[22006.736355] usb-storage 1-1:1.0: Quirks match for vid 090c pid 6000: 100000
[22006.738687] scsi15 : usb-storage 1-1:1.0
[22007.737879] scsi 15:0:0:0: Direct-Access Generic 6000 PQ: 0 ANSI: 0 CCS
[22007.739762] sd 15:0:0:0: Attached scsi generic sg3 type 0
[22007.744742] sd 15:0:0:0: [sdc] 16659456 512-byte logical blocks: (8.52 GB/7.94 GiB)
[22007.745494] sd 15:0:0:0: [sdc] Write Protect is off
[22007.745500] sd 15:0:0:0: [sdc] Mode Sense: 4b 00 00 08
[22007.746235] sd 15:0:0:0: [sdc] No Caching mode page present
[22007.746240] sd 15:0:0:0: [sdc] Assuming drive cache: write through
[22007.750365] sd 15:0:0:0: [sdc] No Caching mode page present
[22007.750372] sd 15:0:0:0: [sdc] Assuming drive cache: write through
[22007.757039] sdc: sdc1 sdc2
[22007.760977] sd 15:0:0:0: [sdc] No Caching mode page present
[22007.760984] sd 15:0:0:0: [sdc] Assuming drive cache: write through
[22007.760989] sd 15:0:0:0: [sdc] Attached SCSI removable disk

In my case the SD is /dev/sdc.

Start GParted

Choose the right device with the top right selector:

Proceed with these steps:

  1. right click on all the partitions and umount them all
  2. move the swap partition to the very end of the sd (right side of the bar)
  3. resize the ext4 partition (sdc2)
  4. commit the changes

On my pc it took 2 minutes.

You’re done.

HowTo: install ClockworkMod Recovery on Xperia X10 Mini Pro using GNU/Linux

Prerequisites

I can show you my situation, I can’t confirm that my guide is usable in different cases:

  • sim unlocked, stock Xperia X10 Mini Pro device rooted (I used my guide)
  • firmware 2.1.1.A.0.6
  • baseband M76XX-TSNCJOLYM-53404015
  • a pc with Ubuntu 11.10 64bit
  • fully functional adb (find more info here)

Disclaimer you must agree before you proceed

Please double check the requirements I wrote before you proceed and remember that:

  • I am not responsible if you brick / ruin your phone in any way;
  • some computer skills are required;
  • do a full backup of your data NOW, it’s not programmed, but you may loose them

Software requirements

CWMInstaller-Linux-v4.zip: download from here or from my mirror.

Do some backup before changing things

On your pc:
adb shell
on the device
# su
# mount -o remount,rw /dev/block/mtdblock0 /system
# cat /system/bin/chargemon > /system/bin/chargemon.original-backup

It’s time to get the job done

The package is done to allow anyone to easily install the whole thing, but I wasn’t able to use the script.
You can see what I did to manually achieve the result.

On your pc
$ unzip CWMInstaller-Linux-v4.zip
$ cd CWMInstaller-Linux/
$ adb push files/ /data/local/tmp

On the phone
$ su
# mount -o remount,rw /dev/block/mtdblock0 /system
# cat /data/local/tmp/recovery.tar > /system/bin/recovery.tar
# cat /data/local/tmp/busybox > /system/bin/busybox
# cat /data/local/tmp/chargemon > /system/bin/chargemon
# chmod 755 /system/bin/recovery.tar
# chmod 755 /system/bin/chargemon
# chmod 755 /system/bin/busybox
# rm /data/local/tmp/chargemon /data/local/tmp/busybox /data/local/tmp/recovery.tar

Done!
# reboot

Test it making a real backup

When booting your phone and when the “Sony Ericsson” letters appear (not the logo), press and release continuously the “back” button.
Once you are in the CW recovery, use the volume keys to navigate upwards / downwards, the “home” or “camera” button to select, the “back” button to go back.

Go to “backup and restore“, “backup” and wait at least 3 minutes (on an empty device).

Conclusions

Now you are ready to install some new ROMs on your device.

References