In this post I’m going to show you how I manually achieved root on this device.
Preamble
I tried every possible automated tool I found (z4root, SuperOneClick), but I had no luck.
My setup involves a GNU/Linux box and this may be the cause.
First of all here are the device details I got from “CurveFish DeviceInfo” app:
Model: U20i

Manufacturer: Sony Ericsson

Device: U20i

Product: U20i_1238-0129

Brand: SEMC

CPI ABI: armeabi

Kernel Version: 2.6.29

SEMCUser@SEMCHost )

#1 PREEMPT Fri Dec 17 18:35:45 2010

Build Number: 2.1.1.A.0.6

Release: 2.1-update1

SDK: 7
Full log here Xperia X10 Mini Pro.deviceinfo.txt.
Prerequisites
Here’s the required tools:
- a PC (mine is powered by Ubuntu 11.04 Natty Narwhal)
- an usb cable for your mobile
- adb configured and running on the PC (find more info here)
Software used:
- psneuter
source code here: https://sites.google.com/site/root4android/rooting/psneuter-c
compiled binary can be found inside SuperOneClick
direct download link: psneuter - su
source code here: https://github.com/ChainsDD/su-binary
compiled binary can be found inside SuperOneClick: search for su-v2
direct download link: su-v2 - Superuser
source code here: https://github.com/ChainsDD/Superuser
compiled binary can be found in the Android market page
direct download link: Superuser_2.3.6.1.apk
Once you have all the necessary stuff, we can start!
Step by step guide
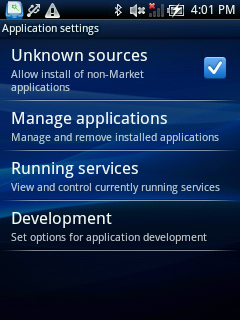
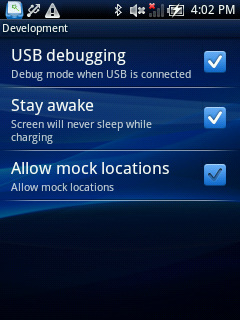
- Start putting device in “debug mode”: Settings – Applications – Development – USB debugging
- Connect device to pc using usb cable and start adb with
adb shell
You may to choose “Charge phone”, so you can still access your sdcard within the phone. - Check you can write in this specific directory:
$ cd /sqlite_stmt_journals

$ touch testfile

$ ls -l

-rw-rw-rw- shell    shell           0 2011-08-02 16:23 testfile

$ rm testfile

$ ls -l

$ exit - If everything went ok, put the needed files in the previous directory; from your pc terminal type:
$ adb push psneuter /sqlite_stmt_journals

3157 KB/s (585731 bytes in 0.181s)

$ adb push su-v2 /sqlite_stmt_journals/su

630 KB/s (26264 bytes in 0.040s)

$ adb push Superuser_2.3.6.1.apk /sqlite_stmt_journals

3533 KB/s (196521 bytes in 0.054s) - Prepare the software on the phone:
$ adb shell

$ cd /sqlite_stmt_journals

$ ls -l

-rw-rw-rw- shell    shell      196521 2011-08-03 13:16 Superuser_2.3.6.1.apk

-rw-rw-rw- shell    shell       26264 2011-08-03 13:16 su

-rw-rw-rw- shell    shell      585731 2011-08-03 13:15 psneuter

$ chmod 755 psneuter - Now you can exec psneuter. You will lose the active shell.
You could see this message or not, that’s not a problem:$ ./psneuter
property service neutered.
killing adbd. (should restart in a second or two)
Your phone will detach and reattach usb connection automatically. - Once more you have to connect to the device with adb shell, but you’ll see a different prompt:
$ adb shell

# id

uid=0(root) gid=0(root) - Now we have a temporary access to root user via adb.
Let’s do the trick on the system:
# mount -o remount,rw /dev/block/mtdblock0 /system

# mkdir /system/xbin

# chmod 755 /system/xbin

# cat /sqlite_stmt_journals/su > /system/xbin/su

# chmod 6755 /system/xbin/su

# ls -l /system/xbin/su

-rwsr-sr-x root root 26264 2011-08-02 18:19 su

# cat /sqlite_stmt_journals/Superuser_2.3.6.1.apk > /system/app/Superuser_2.3.6.1.apk

# chmod 777 /system/app/Superuser_2.3.6.1.apk - It’s time to reboot:
# reboot
That’s it.
Verify
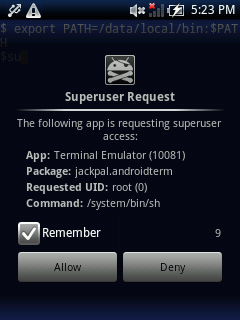
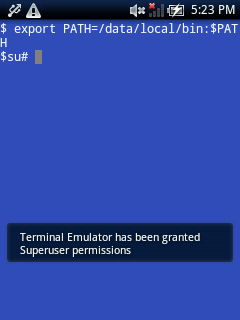
One easy way to verify the process is to install “Android Terminal Emulator” from market and type:
$ su

#
if you get the Superuser popup and the right prompt “#” it’s all ok.


Further reading
Why don’t you install ClockworkMod Recovery now?
Maybe Ice Cream Sandwich?


