Category Archives: Hardware

Tolino Shine 3

Tolino Shine 3: TWRP without modifications

References

Disclaimer

I am not responsible if you brick / ruin your device in any way. Basic computer skills required. Proceed with caution. I cannot be held responsible if anything goes wrong.

Prerequisites

I’m working on Ubuntu 21.10.

sudo apt install fastboot

Procedure

  1. download TWRP built bu Ryogo-Z https://github.com/Ryogo-Z/tolino_shine3_twrp/releases/download/3.3.1/twrp.img
  2. power off Tolino
  3. on the pc type

    fastboot boot twrp.img
    
  4. connect usb cable

  5. keep pushed the button for about 30s

  6. on the pc, you’ll see

    $ fastboot boot twrp.img
    < waiting for any device >
    Sending 'boot.img' (7830 KB)                       OKAY [  0.286s]
    Booting                                            OKAY [  0.003s]
    Finished. Total time: 0.311s
    
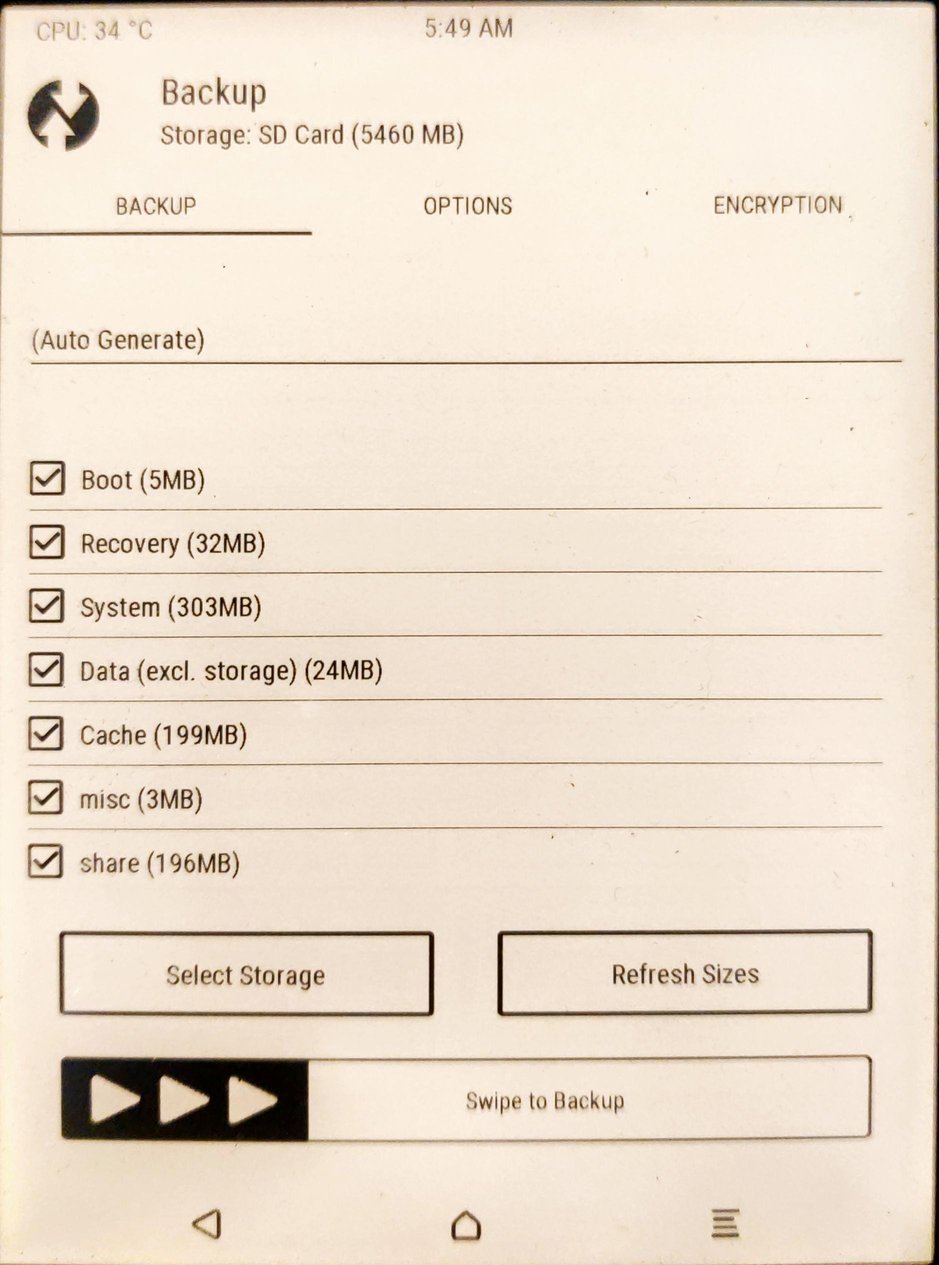
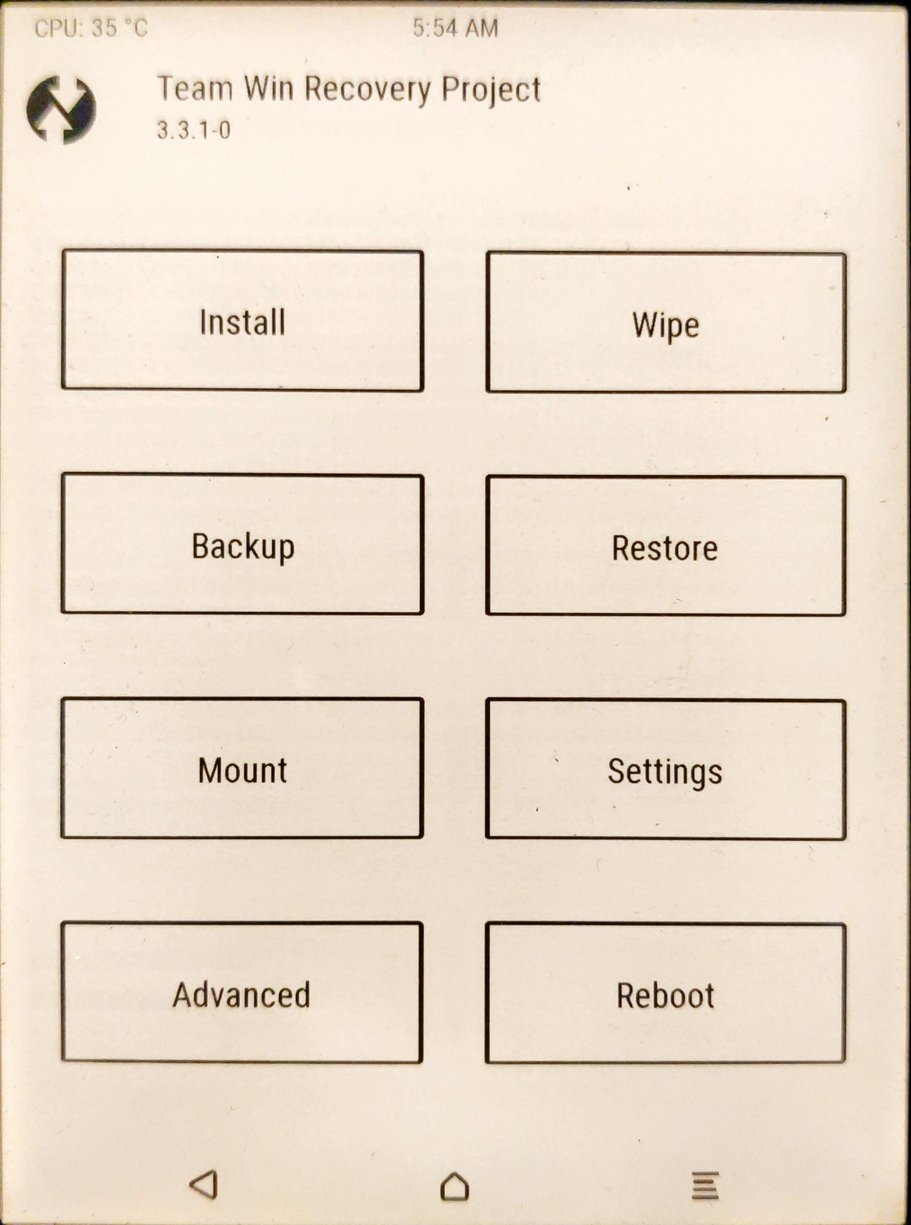
  7. on the device, you’ll see

Software install of Espurna on Sonoff Mini

UPDATE starting from firmware 3.5.0 it’s totally different, see http://developers.sonoff.tech/sonoff-diy-mode-api-protocol.html


It’s possible to flash Espurna on the Sonoff Mini using Diy mode via software.

What you need

  • A Sonoff Mini
  • A mobile device capable of creating an Access Point and which can install eWelink app
  • A PC:
    • with Wi-Fi
    • running GNU/Linux (I used Ubuntu 19.10)
    • with a running web server
    • with git installed

Procedure

Here’s the steps I took to do it:

  1. Download and compile Espurna

    $ mkdir ~/project
    $ cd ~/project
    $ git clone https://github.com/xoseperez/espurna
    $ cd espurna/code
    $ pio run -e itead-sonoff-mini
    
  2. Install and configure eWelink app

  3. Update Sonoff Mini firmware (currently the latest version is 3.3.0, I’ve read you need 3.1.0 at least)

  4. Shutdown the device (detach it from mains current)

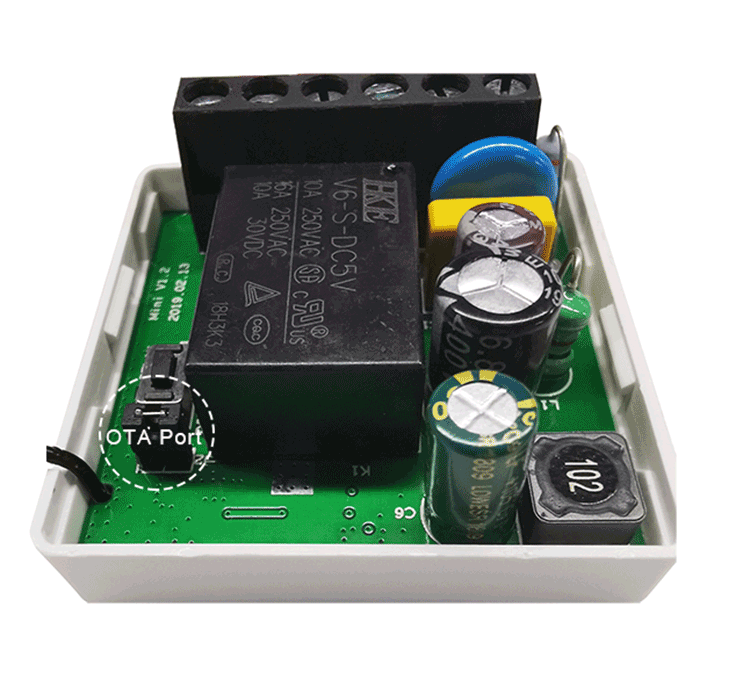
  5. Enable OTA OTA port
  6. Create an Access Point with your phone. These must be the parameters:
    • SSID: snonffDiy
    • pre shared key (password): 20170618sn
    • band: 2.4 GHz
  7. Boot the device (attach it to mains current)
  8. Wait until it connects to the AP (the blue led double pulses)
  9. Connect the PC to the same Wi-Fi
  10. Search for the Sonoff Mini device on the Wi-Fi network

    $ avahi-browse -t -r _ewelink._tcp
    + wlp1s0 IPv4 eWeLink_10009b8ed6                            _ewelink._tcp        local
    = wlp1s0 IPv4 eWeLink_10009b8ed6                            _ewelink._tcp        local
       hostname = [eWeLink_10009b8ed6.local]
       address = [192.168.43.200]
       port = [8081]
       txt = ["data1={"switch":"off","startup":"off","pulse":"off","pulseWidth":500,"rssi":-29}" "seq=1" "apivers=1" "type=diy_plug" "id=10009b8ed6" "txtvers=1"]
    

    Keep track of the deviceid which is, in my case, 1009b8ed6.

  11. Test if everything works as expected

    $ curl -XPOST --data '{ "deviceid": "10009b8ed6", "data": {} }' http://192.168.43.200:8081/zeroconf/info; echo
    {"seq":2,"error":0,"data":"{\"switch\":\"off\",\"startup\":\"off\",\"pulse\":\"off\",\"pulseWidth\":500,\"ssid\":\"sonoffDiy\",\"otaUnlock\":false}"}
    
  12. Unlock OTA updates

    $ curl -XPOST --data '{ "deviceid": "10009b8ed6", "data": {} }' http://192.168.43.200:8081/zeroconf/ota_unlock; echo
    {"seq":2,"error":0}
    
  13. Put file in a web server

    $ cd ~/public_html
    $ cp ~/project/espurna/code/.pio/build/itead-sonoff-mini/firmware.bin .
    $ chmod a+r firmware.bin
    
  14. Test url

    $ curl -s http://192.168.43.53/~max/firmware.bin --output - | sha256sum
    e9e7d72d2c2a8b25678cab7ded20645c5e37c60459cbe6ba1448ed3a62f72b72
    $ sha256sum ~/public_html/max/firmware.bin
    e9e7d72d2c2a8b25678cab7ded20645c5e37c60459cbe6ba1448ed3a62f72b72  firmware.bin
    

    You will need the sha256sum value in a minute.

  15. Do the OTA, keep attention to use the right deviceid, sha256sum and ip values

    $ curl -XPOST --data '{ "deviceid": "10009b8ed6", "data": { "downloadUrl": "http://192.168.43.53/~max/firmware.bin", "sha256sum": "e9e7d72d2c2a8b25678cab7ded20645c5e37c60459cbe6ba1448ed3a62f72b72" } }' http://192.168.43.200:8081/zeroconf/ota_flash; echo
    {"seq":3,"error":0}
    

Done.

References

Turn on Wi-Fi on Netgear Nighthawk D7000 using telnet

This procedure works even if the physical button on the device has been pressed to shut down Wi-Fi.

Enable telnet

Assuming your device’s IP is 192.168.1.1:

$ wget --quiet --user=admin --password='password' -O- http://192.168.1.1/setup.cgi?todo=debug; echo

Enter the device

$ telnet 192.168.1.1
Trying 192.168.1.1...
Connected to 192.168.1.1.
Escape character is '^]'.
D7000 login: admin
Password: 
# 

Set physical button on

# nvram set wifi_btn_on=1

Restart WLAN

# /usr/sbin/rc_app/rc_wlan start

HP ProBook 4540s brightness control in Ubuntu 13.10

The HP ProBook 4540s is a good choice when you need a GNU/Linux machine, but there are some hit and miss on the details. The thing I found most tedious is the brightness controls using the keyboard: they simply don’t work at all.

My soloution

See the kernel parameters actually used:

$ cat /proc/cmdline 
BOOT_IMAGE=/boot/vmlinuz-3.11.0-15-generic root=UUID=8850c025-676a-4e8c-ac83-4ed1147b88d4 ro quiet splash vt.handoff=7

If there’s no reference to acpi_backlight, that’s the problem. Add the parameter to /etc/default/grub changing the following line from

GRUB_CMDLINE_LINUX_DEFAULT="quiet splash"

to

GRUB_CMDLINE_LINUX_DEFAULT="quiet splash acpi_backlight=vendor"

Done